Archive for the ‘Archive’ category

Mt. Ōe (大江山)

June 7, 2014

Mention Mt. Ōe to any Japanese person, and they’ll likely start indulging you in the legends of the many oni (demons) that roam the ridges of the hallowed peak. Despite the less than stellar image, a traverse along the entire mountain range in good weather is one of the best hikes in Kansai for panoramic views.

Oe1

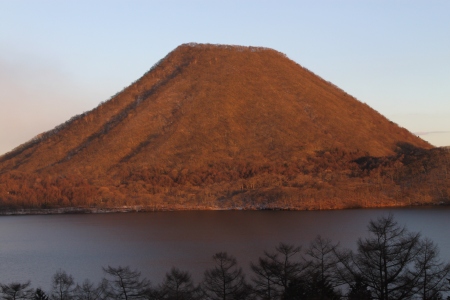
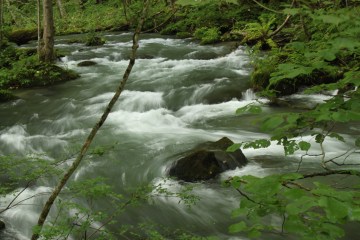
The hike: There’s a water source at the shrine so fill up your bottles before setting out and take a couple of minutes to admire the wonderful view of the valley below. The trail starts just to the left of this water fountain (on the right side of the road), but if you look across the road you’ll see a trail marked for the Oni’s cave (鬼の洞窟). You could consider taking this 10-minute detour to check out the cave (I didn’t have time when I went so I’d be curious to know what’s down there). Anyway, take the trail marked for Senjogatake (千丈ヶ嶽) which meanders through a beautiful forest on a series of wooden steps built into the hillside. It’s a steep climb at first but the grade flattens out a bit as you approach the ridge. After about 15-minutes you’ll reach a trail junction where you’ll turn right for the final climb up to the first of three summits. Shortly before the junction you’ll see a clearing on your left that has good views of the surrounding mountains. Continue the gentle ascent for another 10 minutes until arriving on a broad summit plateau. This is the official high point of Mt. Ōe, so pat yourself on the back and take a few minutes to take in the superb scenery. On a clear day you can see every mountain in Kyoto Prefecture as well as most of the peaks of Hyogo Prefecture. If the cloud is in (as it often is) then you’ll just have to use your imagination. The trail continues on the far side of the summit, so walk past the tall signpost and drop into the forest to the northwest. You’ll soon see signposts indicating a 500 meter horizontal distance to Hatogamine (鳩ヶ峰). Once you bottom out it’s a short but somewhat steep climb above the trees again to the top of the second peak, where there are even better panoramic views. This time you’ll be able to see the Sea of Japan and also see a mountain in front of your that resembles an inverted cooking pot. This is the final peak in the Ōe trilogy, aptly named Nabezuka (鍋塚 – Nabe pot mound). It’ll take about an hour to reach the summit of that mountain, so continue traversing along the trail directly in front of you. Again you’ll drop back down into the forest and descend to a saddle, where you’ll find a parking lot and toilet. This is an escape route if you don’t have the time or energy for the final peak. All you need to do is follow the forest road back down into the valley and you’ll arrive at the bus stop. Otherwise, continue on the trail just above the parking lot. It’s a long, gentle climb with views that open up the higher you go. After about 15 minutes you’ll reach a junction with a path shooting off to the right. The signpost is hand-written and hard to read, but this is the trail you want to take on the way down after visiting the summit of Nabezuka. It’s 500 horizontal meters to the top and it should take you about 10 minutes to reach it. There are a couple of benches you can use to take a rest and admire the scenery. Once satisfied, retrace your steps back to the junction and turn left, dropping through an area of ankle-turning rocks before reaching a forest road with a signpost that says Oeyama Green Lodge 3.5km. Turn left and walk on the flat gravel road, following the signs to the lodge as you wind your way though an area with blue netting set up to keep the deer from eating the tree bark. At the end of the road the trail will fork to the left, so follow the steep switchbacks for about 20 minutes until reaching a paved road. Walk down the road and turn left when you see the signpost that reads Viewpoint of the Senjougataki 150m. If you have extra time you could walk that extra 150 meters to see the waterfall, but keep the (limited) bus times in mind. From here it’s about a brisk 10-minute walk to the bus stop. Turn left when the road merges with the main road (there are a couple of colorful Oni statues here). The bus stop is just down from the entrance to the Oni museum, which makes for a great place to kill time if you’re stuck waiting for the 6:10pm bus.

When to go: This hike is best done from mid-April to late November, when the trails are clear from snow. The peak is also popular for snowshoeing from the ski resort, but you will need a lot of stamina and time to traverse all the way over to the high point.

Access:  Although best approached by car, relying on public transport, though inconvenient, allows you a chance to traverse the entire ridge without having to retrace your steps back to the car. From either Osaka or Kyoto, take a JR train to Fukuchiyama (福知山) station and change to a local train bound for Miyazu (宮津) on the Kita Kinki Tango Railway (北近畿タンゴ鉄道). Get off at Ōeyamaguchi-Naiku (大江山口内宮) station. The railway platform is actually inside of the JR station, so go downstairs and then up to the second floor and buy a separate ticket there. It costs 380 yen one-way from Fukuchiyama station. You might find it faster to take a limited express JR train to Fukuchiyama if you don’t want to leave at the crack of dawn. The first limited express train leaves Kyoto at 9:25am (9:10am from Osaka) on weekends, which allows you plenty of time to connect to the 11:07am train bound for Miyazu. That’ll get you to Ōeyamaguchi-Naiku at 11:36am. Go out the exit, down the stairs, and turn left on the main road when you get outside. Walk 100 meters down the road to the Tourist Information Center, marked by the colorful oni statue outside. The staff there will call a taxi for you (tell them you want to go to Oni-take Inari Jinja (鬼岳稲荷神社). The local taxi company is now bankrupt, so you’ll need to wait about 30 minutes for the taxi to come from Fukuchiyama to fetch you. The taxi will cost about 2500 yen for the 15-minute journey to the trailhead.

From the end of the hike at Ōeyama-no-ie, there is a cheap bus back to Ōe station, where you can take the train back to Fukuchiyama and transfer back to a JR train for Kyoto or Osaka. There are only 2 buses in the afternoon, so aim for the 3:50pm bus if you’re a fast hiker or the more leisurely 6:10pm bus. There’s a great museum at the bus stop dedicated to the Oni culture if you’ve got extra time to kill before the bus. The bus, if you can call it that, is nothing more than a minivan that seats 7 people. It only costs 200 yen to ride and the driver is friendly. Click here for the bus schedule.

Map: Click here

Level of difficulty: 2 out of 5 (elevation change ~200 meters)

Total Round-trip Distance: 10km (4 to 6 hours)

This slideshow requires JavaScript.

Mt. Nanatsu (七っ岳)

May 10, 2014

Mt. Nanatsu is a series of craggy knobs situated in the middle of Fukue Island in the Goto Retto archipelago off the coast of Nagasaki Prefecture. The unspoiled scenery, splendid ocean views, and relative lack of people make it a great weekend getaway for Kyushu residents and visitors alike.

nanatsu7

The hike: The trail starts at the top of the mountain pass. There are a couple of high-tech environmentally friendly toilets at the trailhead and a small parking lot, but not much else. Pass through the shrine gate and into the forest. After passing by the box-like shrine, the path will climb up a series of stairs before turning left for the short but steep climb to the ridge. Once you hit the ridge, turn right and follow the gentle grade for about 20 minutes before the start of the climb begins. You’ll climb up sharply to the summit of a small peak before descending the other side for the final push toward the summit plateau. There are several tricky rock sections to traverse, so make sure you secure your footing and use your arms to help pull yourself up. There are no chains or ropes in place to help with the ascent, and it is a battle against gravity for most of the way. The rocky outcrops offer spectacular views toward Arakawa bay and the surrounding hills. After another 20 to 30 minutes of relentless scaling you’ll pop out on the summit of Mt. Nanatsu, marked by a small summit sign and 270-degree views all around. If short on time, you could descend back the way you came and hitch a ride back into town, but the best part of the hike is the traverse over 4 of Nanatsu’s rocky perches. Continue on the ridge on the opposite side of the Nanatsu summit post and you’ll soon work your way through a short section of knife-edge ridge with vertigo-inducing drops on your left. Once past this the route drops back into the forest and descends steeply to a saddle. The final rock formation can be tricky to descend, so if you look to your right you’ll see a safer alternative through the forest. Once at the saddle the path climbs steeply to the summit of peak #2 (no signpost), before dropping again to another saddle on the other side. Then it’s another sweat-inducing climb to the 3rd peak, where you’ll find views toward the exposed rocks of peak #4. Drop down to another saddle and brace yourself for the final push to summit #4, which has the best panoramic views of all. While there is no signpost on the summit, there is a long wooden pole with peeling red and white paint that serves as a landmark. If you look out to the sea, you can see a narrow valley in front of you. This is where the trail will spit you out if you continue along the ridge. I recommend retracing your steps all the way back to the parking lot, as it’ll be a lot less hassle trying to figure out how to get back into town. However, ff you want to try your luck, then it’s another half hour along the ridge until you reach the junction at Nanatsu pass. Turn left there and follow the signs to Nanatsu shrine. From there, you can follow the road through the valley until it connects with route 384 at the mouth of Arakawa bay. Turn left on the road and walk until you reach route 27, where you should find a bus stop back to Fukue port. If you’ve got the time and energy, I recommend you climb Mt. Tete (父ヶ岳), the highest peak on the island. When you reach the junction to head towards Nanatsu shrine, continue heading on the ridge for another 90 minutes or so until reaching the top. Supposedly there are amazing views towards the emerald green waters of Takahama from there. From Tete, retrace your steps back to the junction and then turn right for the short drop to Nanatsu shrine. Again, there’s no bus stop there, so you’ll need to walk to the coast or try to get a lift from another hiker. The scenery more than makes up for the effort it takes to get to this beautiful area of the island.

When to go: This hike can be done from March to December, when there is no snow on the peak. The rocky terrain and vertical cliff faces make it a precarious proposition during the snowy months. Spring and fall are the most comfortable times on the mountain, as the summer heat may drive you to leaping off the precipices.

Access:  Your first step is to get to Fukue island. There are a couple of regular ferries per day from Nagasaki port, along with a couple of high-speed jetfoils that’ll shuttle you across the sea in about 90 minutes. There’s also an overnight ferry from Fukuoka port. This site gives an overview of all the ferry options, along with links to the timetables. Once you arrive at Fukue port, you’ll need to take a bus bound for Arakawa (荒川) and get off at Nanatsu Tozanguchi (七っ岳登山口) bus stop. There are only 4 buses per day, so it might be faster and easier to take a taxi for the 40-minute journey to the trailhead. You could also try your luck hitching. Click here for the bus schedule.

Map: Click here

Level of difficulty: 3 out of 5 (elevation change ~300 meters)

Distance: 3.5km (2 to 3 hours)

This slideshow requires JavaScript.


Mt. Sanage (猿投山)

April 3, 2014

Located on the outskirts of Toyota city in Aichi Prefecture, Mt. Sanage is the local outdoor playground for Nagoya hikers, walkers, and trail runners. The peak features ancient temple buildings and fantastic views of the Minami Alps, The Chuo Alps, Mt. Ena, and Hakusan on clear days.

sana4

The hike: After checking out the shrine, walk up the narrow paved road to the right of the shrine. After 200 meters you’ll see a parking lot on your left, which is designated for hikers who drove. The mountain has no shortage of walkers, and you’ll be sharing the trail with half of Nagoya if coming on a busy holiday weekend. The official trailhead starts at Gomon-sugi (御門杉), which is a 30-minute slog on the boring paved road. I recommend taking another path that is unmarked on the hiking maps. It can be a difficult to find, but keep your eyes peeled on the left side of the road and you’ll see a faint trail with a small wooden signpost with a red arrow painted on it. If you reach the watermill then you’ve gone too far. This path climbs steeply for 5 minutes before reaching a rolling ridge that runs parallel to Mt. Sanage. Even on weekends, very few people use this path, and it’s a great start to the hike through a beautiful hardwood forest. You’ll reach a junction in about 30 minutes or so. Turn right at the junction (there appears to be a trail that runs directly from Sanage shrine to this point, but I can’t confirm for sure). Anyway, you’ll now start a long climb towards the summit of Mt. Sanage. There are signposts pointing to 山頂 or for 東宮. As long as you follow those you’ll be ok. You’ll soon reach a junction with a signpost pointed for Shiro-ga-mine (城ヶ峰山頂). Drop your pack here and turn left for the steep 2-minute climb to the summit, where there’s a fantastic view of Nagoya city and the Suzuka mountains. After admiring the views, retrace your steps and continue the gentle ascent on the ridge. The views will open up every now and again through the trees. Your next landmark will be a paved forest road, which the trail cuts a path directly across (via a steep descent and climb up the other side). Shortly thereafter, you’ll reach a junction where the main trail coming up from Gomon-sugi on your right will join the main path. Here the crowds will increase tenfold. From here the path is marked as Tokai Shizen Hodo (東海自然歩道). The route is incredibly easy to follow and virtually impossible to get lost.  Continue climbing on the wide path towards 東宮, following the signs and the crowds. In a couple of minutes you’ll see a steep spur trail on your right which climbs to an observation point. This is definitely worth the detour for the view of the Minami Alps in good weather. The trail meets up with the main trail after passing by the lookout point. If you want to save a bit of energy then you can simply ignore the spur until it reconnects with the main trail and then backtrack (the lookout point is closer here). You could always hit it on the way back, since you’ve got to take this trail again anyway. After 10 minutes or so, you’ll see a trail on your left, but ignore this and keep following the signs to 東宮. The route will once again arrive at a paved forest road, where you’ll likely to find a few cars parked from very lazy hikers. Enter the stone shrine gate on the other side of the road and continue climbing towards 東宮, which should take about 15 minutes to reach. This is a great place to take a break among the giant cryptomeria trees. From here, the path continues on the ridge for about 20 minutes to the true summit of Mt. Sanage, where you’ll have an amazing view of the Chuo Alps, Mt. Ena, Ontake, and Hakusan if you’re lucky. Most people simply backtrack after reaching the summit, but I recommend continuing on the Tokai Shizen Hodo and looping back to the shrine. To do this, simply continue on the ridge in front of you, following the signs for 雲興寺. After 30 minutes or so, the path will descend to a mountain pass marked at Aka-saru touge (赤猿峠). Instead of continuing to 雲興寺, look for the path that hooks left. There used to be a signpost here but it’s gone. The trail follows a gentle stream before reaching a dirt forest road with incredible erosion problems due to the influx of 4WD ATV and dirt bikes. Turn left when you reach the road and follow it until you reach a paved road. Again turn left, climbing up for about 15 minutes until reaching the west shrine entrance (西宮). The shrine itself is a very steep 1o-minute climb up some stone stairs. It’s mildly interesting but definitely not a ‘must-see’. Only take the detour if you have the energy. Otherwise, continue climbing on the paved road for a few minutes until reaching a trail on your left. Take this trail and it will connect back with the Tokai Shizen Hodo. Turn right when you reach the main trail and descend back to the junction you saw earlier in the hike (near the lookout point). Turn left when you reach the sign that says 猿投神社 2.8km 55分. The path is easy to follow and descends via some wooden log stairs before passing through a small rest shelter. After this it’ll spit you out at Gomon-sugi. Turn right here and follow the road back to Sanage shrine, being sure not to miss the last bus into town. Hitchhiking is definitely a possibility if you make new friends on the mountain. Most people drive here, so I’m sure they’ll be happy to give you a ride to Toyota station if you explain you came by bus!

When to go: This hike can be done year round, but bring some simple 4-point crampons if going in the winter. The best time to view the Japan Alps are in the late spring and in autumn, when the air quality is good.

Access:  From Nagoya station, take a train on the Meitetsu line and get off at Toyota-shi (豊田市) station. You’ll need to change trains at Chiryu station to the Meitetsu-Mikawa line. Alternatively, you can take the subway to Akaike station and change to the Meitetsu line there. From Toyota-shi station, take a bus from Bus Stop #5 bound for Fujioka Shisho (藤岡支所) and get off at Sanage Jinja Mae (猿投神社前). Click here for the schedule.

Map: Click here

Level of difficulty: 3 out of 5 (elevation change ~500 meters)

Distance: 10km (4 to 6 hours)

This slideshow requires JavaScript.

Mt. Fujiwara (藤原岳)

March 1, 2014

Mt. Fujiwara is a rotund, boulder-dotted peak on the eastern cusp of the Suzuka mountains in northern Mie Prefecture. The rolling, grass-lined plains, unique alpine flora, and unobstructed panoramic views make it a popular year-round destination for serious outdoorsy Nagoyaites.

fujiwara1

The hike: When you exit Nishifujiwara station turn left and follow the paved road until it meets up with route 614. Cross over the small stream and take your second left (ignore the small street just after the creek). If you reach the elementary school then you’ve gone too far. After you turn, follow the road to the terminus and you’ll find a rest house with some restrooms and a parking lot most likely full of cars and hikers. The trail starts to the left of the building. Go under the shrine gate and head into the forest. You’ll soon pass by a shrine on your left and the real climb will begin. The route doesn’t waste any time gaining altitude, and the first third of the mountain is through a rather boring cedar forest. The path, like most big climbs in Japan, is divided into 10 stagepoints (known in Japanese as gōme). After reaching a fence, turn right following the arrow sign and you’ll soon reach a small rocky area known as the 2nd stagepoint (二合目). Take a quick break here if you need to, because the trail does anything but let up. Just past this the trail will veer towards the right, passing through an area with a metal handrail on the right side. There are a couple of nice beech trees in this area, and you can start to get a glimpse of the valley below in the gaps between the trees. Next it’s back into the cedar forest, past the 3rd stagepoint (三合目) and about twenty minutes further on you’ll reach a small plateau at stagepoint #4 (四合目). Luckily you’ll enter a beautiful area of deciduous trees and the contours will let up a bit. Enjoy this while you can as there’s still a lot of climbing left ahead. After a couple of switchbacks the course will veer left, following a ravine past the 5th stagepoint (五合目) before diving back into a cedar forest on the right. Here the angle steepens once again, and you’re faced with a sweat-inducing slog past the 6th (六合目) and 7th (七合目) stagepoints before reaching the crest of the ridge at the 8th stagepoint (八合目). This is a great place for a break because there is still more climbing yet to come. From here you’ll rid yourself of those pesky cedar trees for the remainder of the ascent. Turn left from the 8th stagepoint and you’ll soon see a junction on your right. This is an alternative way off the mountain that is currently (as of March 2014) closed to hikers. There was a lot of damage in a recent landslide and there’s no telling when the trail will be repaired. If it is open, then it’s an alternative way off the mountain and the path will loop back to Nishifujiwara station. Anyway, continue up the long switchbacks past the 9th stagepoint (九合目) and up a little further for about 20 more minutes until you break out of the forest and reach the summit plateau. You’ll find the mountain hut here nestled against a buffered hillside. It should have taken anywhere from 2-1/2 to 3 hours of tough climbing to reach this point, so reward yourself with a nice lunch or refreshing bottle of water that you should have packed with you.  The summit of Mt. Fujiwara is still about 20 minutes away, so turn left and descend away from the hut, following the sign for tenbōdai (展望台) and over two small rises before reaching the base of the final climb towards the tall point. In the green season there are two paths to choose from, but in winter you can pretty much kickstep your own path up the broad, bald knob, but be careful of avalanches, as they do sometimes occur in this area. The summit itself does not have a signpost marking the summit. Instead there’s a sign reading 展望台, so rest assured you are on the high point. After admiring the panoramic views, retrace your steps back to the hut, where a decision will have to be made. If you continue on the trail behind the hut for another half hour, you can reach a rock formation called Tengu-iwa (天狗岩). If the weather is good and you’ve still got energy I recommend the 1-hour round-trip jaunt, as it enters a beautiful grassy plateau with plenty of wildflowers and far-reaching views. After returning to the hut, simply retrace your steps all the way down the mountain, or consider staying the night in the hut to enjoy the stars and the sunset/sunrise (but bring plenty of water, as the hut has none). All in all it makes for a great alternative to the busier area Gozaisho to the west.

When to go: This hike can be done year round, but you’ll need some 6-point crampons or snowshoes if hiking in January or February. The route is popular with hikers year round, and there’s a free emergency hut near the summit that is basically a floor with no supplies. Bring your own gear and plenty of water if you want to stay here (in winter it’s possible to melt snow). Spring and summer are famous for wildflowers while autumn brings the fall colors and immense crowds.

Access: This hike is best accessed from Nagoya, but if you get an early start or have your own transport then it’s possible to do as a day hike from Osaka. From Kintetsu Nagoya station, take an express train on the Kintetsu line bound for Yokkaichi and get off at Kintetsu-Tomida (近鉄富田) station. From here, change to a train on the Sangi Railway (三岐鉄道) bound for Nishifujiwara (西藤原) and get off at Nishifujiwara. Trains are infrequent, so make sure you check the train schedule before departing Nagoya. It takes about 90 minutes including connection times. From Osaka you’ll need to change trains 3 times and it’ll take around 3-1/2 hours to reach Nishifujiwara.

Map: Click here

Live web cam: Click here

Level of difficulty: 3 out of 5 (elevation change ~1000 meters)

Total round-trip distance: 9km (5 to 7 hours)

This slideshow requires JavaScript.

Mt. Nosaka (野坂岳)

January 8, 2014

Mt. Nosaka is a bulbous peak sitting on the edge of Tsuruga city in Fukui Prefecture. The panoramic views on a rare clear-weather day are some of the best in the entire region.

125

The hike: From Awano station, go out of the unmanned ticket gate and turn left, following the signs for 少年自然の家. Take a left at the first paved road you see. The road crosses under the train tracks and winds its way up towards the campground and youth center. The road passes by a few parking spaces and random buildings before head past some A-frame bungalows with colorful roofs. You can find the trailhead marked by the sign 野坂岳登山口 around a bend in the road just above the bungalows. The first part of the trail follows a dirt road through a rather boring cedar plantation. After a few minutes of climbing you’ll see a beat-up wooden sign reading 野坂岳山頂約2時間20分 (2 hours and 20 minutes to the summit). The route crosses a small stream two times before arriving at a small jizo statue just before the final crossing, which is marked by a metal staircase on the other side of the creek. This is your last place to get water on the entire trail, so fill up if you’re feeling thirsty. Cross the stream and climb the staircase, following the switchbacks as they wind up towards the ridge. The views towards Tsuruga city will open up behind you the higher you go. Just before you reach the ridge you’ll see a small path that leads off to the right for Gyoja rock (行者岩). The signpost and path will be buried under snow in the winter, and there are better views from the summit anyway, so feel free to skip the lookout point if you’re short on time or if visibility is bad. After a few more switchbacks you’ll reach the start of the ridge at Ichi-no-dake (一ノ岳). There’s a small jizo statue here and the views of Tsuruga city and Hakusan on a clear day make it a great place to take a quick break before the final push towards the summit. From here, the going gets a lot easier, as it’s only about 200 vertical meters to the summit. You can see the next two peaks off to your left that you will traverse up and over on your way to the summit. The trail blazes through a wonderful forest of beech trees up to the top of Ni-no-dake (二ノ岳). From here the route drops to a saddle before climbing rather steeply on the other side to the summit of San-no-dake (三ノ岳), where you can see the roof of the emergency hut at the top of the next rise. Drop down to the final saddle for the last push towards the peak. The top is just a few meters past the hut and in good weather the unobstructed panoramic views are incredible, as you can see not only Hakusan, but also most of the peaks of Gifu Prefecture and even some of the Japan Alps if the weather is really clear. You can also see Mt. Ibuki and the Hira Mountains surrounding Lake Biwa. If the winds are strong or the weather is bad you can take refuge in the small hut, which doubles as a mountain shrine. There’s room for about a dozen people or so and a good place to meet the locals who climb this peak nearly every day. After adequate rest, simply retrace your steps all the way back to Awano station, or try making a new friend who might offer you a free ride to Tsuruga station, which will make getting back to Kansai a bit faster.

When to go: This hike can easily be done between late March and early December, when the trail is clear of snow. If you’ve got crampons and/or snowshoes, then a winter ascent is possible as well. The locals climb the peak year round and keep very detailed blogs documenting current conditions. Be warned that the peak is a magnet for clouds and bad weather, so make sure you check the local forecasts before setting out to ensure an enjoyable hike.

Access: From Osaka or Kyoto stations, take the JR Limited Express Thunderbird train bound for either Kanazawa, Toyama, or Niigata and get off at Tsuruga (敦賀) station. Change to a local train on the Obama line bound for Higashi-Maizuru (東舞鶴) and get off at Awano (粟野) station (just 2 stops from Tsuruga.) If you want to save a bit of money, then instead of the Limited Express train, you can take a Shin-kaisoku train as far as Omi-shiotsu and change to a local train for Tsuruga, but it’ll take 2-1/2 hours from Osaka one-way and you’ll need to double check the train times on the Obama line to ensure a smooth connection, as the Higashi-maizuru trains only run once an hour at most.

Map: Click here

Level of difficulty: 3 out of 5 (elevation change ~850 meters)

Distance: 11km (4 to 6 hours)

This slideshow requires JavaScript.

Mt. Haruna-fuji (榛名富士山)

November 24, 2013

Just as the name implies, Haruna-fuji is a miniature version of Mt. Fuji, with views of the real Fuji from the summit on clear days. Although the top has been wrecked by the addition on a gondola and a TV antenna, the hike through the wonderful bamboo-grass lined deciduous forests is highly recommended.

030

The hike: From the bus stop, be on the lookout for the visitor’s center, a long, low rectilinear building that has basic information about the mountain. To the left of the visitor’s center is Haruna Lodge, a good place to grab some lunchtime noodles. The trailhead starts just to the right of the visitor’s center, across the paved road. Look for the sign that says 榛名富士登山口. If you got off the stop in front of the gondola, then walk on the paved road to your left (towards the lake), and you’ll find the trailhead on your right. The route is incredibly easy to follow, and if you’ve gone during the week, you’ll likely have the place to yourself. Though the maps say to allow 1 hour to reach the top, if you’re quick and don’t take any breaks, then you can make it in about 40 minutes. The trail is lined with bamboo-grass and verdant foliage. The lack of cedar trees is will be refreshing to those of you used to hiking around the rest of Kanto. The views really open up once you hit the summit plateau, but unfortunately you’ll be staring right at the large building housing the machinery for the gondola. There’s a restroom and vending machine here. Walk past the gondola and turn left, climbing the wooden steps towards Haruna shrine, which sits on the true summit of the mountain. You’ll have wonderful views from here, even if you have to share it with heel-toting tourists who took the easy way up. From the summit, head down the path just to the left of the shrine.  The path is marked as Yusuge Motoyu (ゆうすげ・元湯. The route is incredibly steep, so be careful during the cooler months when there is ice and snow on the path. Despite the gradient, the trail is easy to follow, and it will spit you out behind Hotel Yuusuge in about 30 minutes or so. If you’re based at this hotel, then it’s a great place to end. If you’re heading back to Tokyo, then you can loop back around to where you started (or to the bus stop to Takasaki) by turning left when you hit pavement and turning left again. Descend to the lake and follow it clockwise. The trail follows the edge of the lake before skirting the edge of a small side vent emerging from Haruna’s western flank. All in all it should take about 3 hours to complete the entire loop, depending on how many breaks you have taken. You can also combine this hike with Mt. Eboshi if you’re looking for a bit more exercise. 

When to go: This hike can be done year round, but you’ll need some 6-point crampons if hiking in January or February. Try to go on a sunny day with clean air and good visibility, as the views are superb. If you visit in mid-December, then you can see the lakeside illumination and fireworks. This is the only time of year where the gondola runs at night. It’s a cheeky way to get to the summit, but it’s really beautiful if you can stand the arctic temperatures. Head up the gondola just before sunset and watch the lights come on from the summit. The night view of Kanto is eye-popping as well.

Access: From Tokyo, take a train to Shibukawa (渋川), and transfer to a bus bound for either Ikaho hot spring (伊香保温泉) or Ikaho-Harunaguchi (伊香保榛名口) and get off at Ikaho Bus Terminal. From here, you can catch a bus bound for Haruna-ko Onsen Yuusuge (榛名湖温泉ゆうすげ). Get off at either in front of the Ropeway (ロップウェイ前) or Lojji Mae (ロッヂ), the next stop.  The buses are poorly-timed, so double-check both schedules before you set off, or consider breaking up the trip by staying at the hot spring. Click here for the bus from Shibukawa, and here for the bus that runs between Lake Haruna and Ikaho hot spring. Alternatively, if you’re staying in the area for a few days, then you can simply just stay at the Kokumin-shukusha (recommended), or the more expensive Hotel Yuusuge, which is more convenient for the hike. Either place will pick you up from the bus stop if you’ve taken the bus from Takasaki (see Mt. Kamon hike for a description of that bus route). From the Kokumin-shukusha, you’ll need to walk clockwise around half of the lake to reach the trailhead.

Map: Click here

Live web cam: Click here

Level of difficulty: 3 out of 5 (elevation change ~300 meters)

Distance: 3.5km (2 to 3 hours)

This slideshow requires JavaScript.

Mt. Kurikoma (栗駒山)

November 8, 2013

Mt. Kurikoma is an active volcano straddling the border of Iwate and Akita Prefectures in northeastern Honshu. The views of Mt. Chokai, the spectacular volcanic scenery, and the soothing hot springs make it a great place for a weekend getaway.

IMG_8426

The hike: When you get off the bus, walk a few meters to the hot spring river that runs between the red-roofed hotel and the outdoor bath (露天風呂). Believe it or not, the path actually runs right by this steaming water source. As you walk up the path, you’ll see a small shrine on your right, across the small steam. Since this is an active volcano, it might be a good idea to pay your respects to the mountain gods before commencing the hike. Follow the concrete path past the stream and into the forest. You’ll soon find a path on your right. Ignore this and continue on the concrete trail, climbing to a small series of rock formations. If the weather is good then you can climb these rocks for a good view of the hot spring hotel.  Soon after, you’ll reach another junction with a trail heading off to the left. Ignore this spur trail and continue on, past a small hut and the ruins of an old bathhouse.  After a short climb, you’ll drop down to a meadow and reach yet another junction. Turn left here and follow the wooden boardwalk across a scenic, grassy area of the volcano. At the next junction, you’ll see a huge wooden signboard with a giant map of the mountain. Turn right here and climb a short distance to Taikadai (苔花台), where you’ll find a trail heading off to the left. Ignore this path, as you’ll use this route on the descent, creating a really nice loop hike. Continue straight on, being careful not to stray into the hot spring river running along the left side of the trail. Although tempting, the area is full of poisonous gases, so stay on the path. The route runs parallel to the river, climbing higher and higher towards the summit plateau before flattening out and reaching a beautiful lime-colored caldera lake named Showako (昭和湖). Just before the lake, the trail will split to the left. You can take either trail, since they meet up a short distance later at the shores of the lake. Here you’ll find a toilet hut on your right, which is well worth checking out for the foot pump flushing mechanism. Take a break on the benches in front of the lake, as the steepest part of the climb awaits. On the left side of the lake, the stair-infested trail once again darts back into the forest, increasing in steepness the higher you climb. Hang in there because the views awaiting you are well worth the sweat-inducing effort. It should take about 45 minutes of steady hoofing to reach the ridgeline at Tengu Daira (天狗平), where the panoramic views will start to emerge. You should see all of the mountains of southern Tohoku rising out in front of you. On a clear day, you can see Mt. Chokai as well. Turn left once you reach this lookout point, and you will reach the high point in about 15 minutes or so. Besides the giantic signpost, you’ll find a small shrine which makes a great backdrop for photos. There is a flat area just before the summit which would make an incredible place for a bivy (you just need to bring enough water and pack out your fecal waste). Sunrise from the summit on a clear day may very well be one of your highlights in Japan if you can time it correctly. Anyway, to complete the loop, take the trail from the top marked for Ubunuma (産沼). The path is easy to follow and lined with a plethora of wildflowers in bloom. When you reach the small pond, you’ll find a path on your right leading to 笊森. This route was only recently reopened after being damaged in the 2008 Iwate earthquake. Ignore this path and follow the signs towards Sukawa Onsen (須川温泉). The trail meanders through the forest before crossing a small stream, followed by a bigger river. This river can be tricky to ford when the river is swollen due to heavy rain or snowmelt, so take care. There’s a signpost here marking the way back to Taikadai (苔花台). Just before you reach that point, you’ll drop down to yet another river that needs to be crossed. Just after crossing, you’l reach the junction. Turn right here and retrace your steps back to the next junction. Instead of turning left here, keep heading straight through a scenic marshland comparable to what you would find at Oze National Park. At your next junction, you can take your pick of trails, as both lead back to the starting point. I headed left, following the easy-to-follow path until it reached the back of the hot spring hotel. From there, navigate your way through the hot spring river maze to the bus stop. Be sure to allow enough time to have a bath at the hot spring there. The outdoor bath (露天風呂) costs 650 yen and is worth every penny.

When to go: This hike can be done from early May  to early November, when the road to the trailhead is open. The mountain is famous for fall colors, so expect crowds if you go in October. Bring light crampons if you’re hiking anytime before July.

Access: From Tokyo, take a Shinkansen train bound for Hachinohe or Morioka and get off at Ichinoseki (一ノ関). Not all trains stop at this station, so double-check before boarding. From there, take a bus from bus stop #9 bound for Sukawa Onsen (須川温泉) and get off at the final stop. Please note that there are only two buses per day, (leaving at 9am and 2:30pm) making it tricky to do as a day hike. You can either stay at a hotel near Ishinoseki station, or stay at Kurikoma Sansou (highly recommended) at the trailhead. This hotel has an incredible outdoor bath with views of Mt. Chokai. Click here for the bus schedule.

Map: You can pick up a free full-color map from the tourist information center at Ishinoseki station. The office is directly in front of Bus stop #9 (the bus stop you’ll use to get to the trailhead)

Level of difficulty: 2 out of 5 (elevation change ~500m)

Distance: 〜9km (3-1/2 to 5 hours)

This slideshow requires JavaScript.

Mt. Esan (恵山)

November 2, 2013

Mt. Esan is an active volcano located due east of Hakodate city on the tip of Kameda Peninsula. The panoramic views and sulfur-spewing steam vents are not to be missed.

IMG_6810

The hike: From the bus stop, head up the road (with the ocean on your right) for about 50 meters until you see a blue road sign pointing the way to Mt. Esan. Turn left here and follow the road all the way to the trailhead. There used to be a path that ran through the bush here, but it’s been discontinued. There’s a chance it’s still there, but there are no signs pointing the way, so you’ll need to spend some time exploring small back roads to try to find it. Anyway, the road will soon pass by an abandoned elementary school on the right side, and the road curves toward the right around the school. Stay on the road and feel free to try to thumb a ride if the road walking becomes monotonous. Your next landmark will be a giant gold-colored kannon statue on the right. It’s worth a quick walk down there to see it, as it towers over everything. After that, the main road heads left, past a hot spring and up towards the start of the hike. You’ll soon pass by a gate that should be open for you to pass through (the gate is closed at night to prevent people from loitering after hours.) The road goes through a series of switchbacks, with a generous amount of jizo statues, as well as views of the sea and of the volcano itself. About a quarter of the way up, you’ll find a road on the right with a sign posted for C course (C コース 787m). Ignore this sign and continue straight on. After 30 minutes of switchback climbing, you’ll reach the top of the rise and actually descend a short distance to the parking lot and trailhead. If you’re a brisk walker then it should take about an hour from the bus stop to the trailhead. From here, things start to get interesting. Take the paved trail that leaves next to the toilets towards the smoldering volcano. Soon you’ll see a sign pointing for the Esan Tenboudai Course (恵山展望台コース). Take that path a short ways past a concrete dam until reaching a junction. A trail branches off to the right marked  噴気孔コース. Ignore this trail and continue straight, following a small sign marked Esan Sanchou (恵山山頂). The route skirts the left edge of the mountain before meeting up with another trail marked 権現堂登山コース 1979m. Turn right here and follow the easy path all the way to the summit. It’s a vertical elevation gain of about 200 meters spread out over 2km and it’s a really pleasant path except for the poisonous gases that may be wafting your way. The route is incredibly well-marked, with signposts every couple of hundred meters or so. Still, it can get tricky to find in poor visibility, so take care not to wander off course and end up in a volcanic steam vent! It should take about 45 minutes of steady climbing to reach the summit, where you’ll have incredible panoramic views all around. On a clear day you can even see parts of Aomori Prefecture across the Tsugaru Strait. After admiring the scenery, retrace your steps all the way back to the bus stop, or consider traversing down the northern face of the volcano to Mizunashi Kaihin hot spring, a free outdoor bath set right on the ocean shore. To get to the bath, when you retrace your steps back to the 権現堂 junction, but instead of turning left to head back to the parking lot, continue straight towards the volcanic flatlands in front of you, and you should see a trail branching off towards your right. If you head that way be warned that there’s no public transport from the hot spring, so you’ll have to rely on hitching to get back to Hakodate. 

When to go: As this is an active volcano, aim to go during periods of clear weather so you can see which direction the volcanic gases are blowing. If the wind is coming from the east, then the noxious fumes will blow directly over the hiking path, and you’ll find yourself gasping for breath. Aside from this, you can pretty much do this hike year round, though you’ll need to be prepared for snow in the winter.

Access: If you’ve got your own transport, you can save a lot of road walking by driving directly to the trailhead. Otherwise, from bus stop #6 at Hakodate station, take a bus bound for Esan Misaki (恵山岬) and get off at Esan Tozanguchi (恵山登山口).  The bus takes about 2 hours and costs 1480 yen one-way. Click here for the bus schedule.

Level of difficulty: 2 out of 5 (elevation change 618m)

Distance: 10km ( 4 to 6 hours)

This slideshow requires JavaScript.

Takedao Tunnel Hike (武田尾)

October 27, 2013

Officially known at Mukogawa Gorge (武庫川渓谷), this is a gentle, family-oriented afternoon stroll along the old, abandoned  JR Fukuchiyama Line railway tracks. There are several dark, creepy tunnels to pass through, so a headlamp or flashlight is imperative.

IMG_0233

The hike: When you exit the train at Namaze station, go out the ticket gate and head down the main road (with a Co-op Mini supermarket on your left) through the small tunnel that goes under a mountain. After the tunnel the road curves towards the right and meets a busy main road. You’ll see a bridge with a red railing directly in front of you. Do not cross the bridge. Instead, turn left, staying on the left shoulder of the really busy road on the narrow sidewalk. Follow this main road for about 20 minutes (past a Cosmo gas station), until you reach a large freeway overpass. Walk under the huge expressway and take your first right, turning down a paved road that has some curvy switchbacks. There are no signposts so it’s very easy to get lost, but make sure the road you take descends towards the river. At the end of the paved road turn left and follow the dirt road that will eventually turn into a proper hiking trail. Just as the trail starts, you’ll see a huge metal sign in Japanese with the kanji (告) telling you that this is not a hiking trail! Don’t worry, it’s just JR trying to inform you that it won’t take any responsibility if you injure yourself or get attacked by a zombie. In the summer the trail can be quite overgrown because the company that owns the land (JR railway) doesn’t do any trail maintenance. The path follows the left bank of the river most of the way, and if you look down you can still see the wooden railway ties in place, but the rails have been removed. Also, keep your eyes peeled on the left side of the path and you can see old railway signs from time to time. Anyway, you’ll soon come to a metal lookout point on your right. Climb the metal stairs and take in the scenery. From here the trail continues upstream for about 15 minutes until reaching the entrance for the first tunnel. This is a good warm-up of what to expect for most of the way, and if you let your eyes adjust to the dark, then a flashlight is not necessary in this first tunnel. After the first tunnel, the trail becomes a bit wild in the summer, with lots of overgrown foliage and the rhythmic pattern of half-buried wooden railroad ties. The river scenery on your right is nice, but to be honest would be a hundred times nicer if the river weren’t so polluted. There’s a factory upstream that is dumping some questionable waste into the river. Even if you could get down to the river bank, I would not swim there. Anyway, soon you’ll reach the second tunnel, which is  one of the longest and scariest on the entire route. Due to the bend in the tunnel, a flashlight is absolutely necessary. If you suffer from claustrophobia then perhaps this is one hike to miss. If you’ve brought your kids then they’ll have a blast running through the tunnels playing hide and seek. Be careful of water dripping from the ceiling of the aging tunnels, as it can get muddy in places. After coming out of the the tunnel, you’ll soon pass through a really short tunnel that is only about 5 meters long. There are some railroad ties here placed as makeshift benches if you want to take your first break. Otherwise, just keep walking on the flat trail admiring the river scenery. The next tunnel will come in about 20 minutes or so, and ends at the base of a stunning railroad bridge that has been fenced off. It looks like the trail ends, but don’t worry, as you can cross the bridge on your left. If you want to re-enact the scene from Stand By Me then be my guest, though one slip will mean tumbling into the river far below.  Immediately after crossing the bridge you’ll duck into another tunnel before popping out and following the right bank of the river (with the river on your left). Here the scenery resembles more of a walk in the park than a mountain stroll, and in the spring the cherry blossoms in view are a site to behold. You’ll soon reach your first signpost of the day, pointing towards Takedao (武田尾), which is still 1.6km away. After 5 minutes you’ll pass a lion carving on your right with a stone stairwell that leads to a forest filled with cherry blossoms. Feel free to explore it if you’ve got extra time. Otherwise, continue straight on through a short tunnel that is still completely made of brick. Just past the tunnel you’ll see a trail on your left that leads to a plaza and offers access to the river bank (again, don’t let your kids play in the filthy water). Soon after, you’ll pass through a final tunnel made of brick before reaching an area on the right with some large rocks that make a great place to take a break. Just after you’ll find some toilets on your left that will probably have a really long queue. Don’t worry, as there are more, less crowded toilets just 5 minutes away in the main town. Your next landmark will be a wooden bridge. Cross this and take the stairs on your left, and you’ll see a sign indicating 600 meters to Takedao station (武田尾). From here you’ll walk through the main street through the tiny town and will likely find hikers hanging out in the local shops drinking beer. Keep walking for about 15 minutes, and you’ll see Takedao station on your right. If you’re keen for a hot spring bath, then instead of going to the station, continue walking along the river for another 15 minutes or so, and you’ll find a couple of ryokan that offer baths. They aren’t cheap though. The nicest one costs 1800 yen just for a bath and is available from 11am to 5pm only. All in all is a 2 to 3 hour stroll depending on how many breaks you take.

When to go: This hike can easily be done year round. Make sure you bring a flashlight or headlamp, because two of the tunnels are impossible to traverse without one. If you’re there on a weekend you could rely on other groups, but during the week do not expect must other foot traffic. There is a very cool art event every September which uses some of the tunnels near Takedao station as a canvas for a giant art and music project. It’s highly recommended, and can be combined with a hike of the tunnels if you time it correctly. Search for Takedao Art Tunnel Event on Facebook and check out these photos from this year’s event.

Access: From Osaka station, take train on the JR Fukuchiyama Line bound for Shin-sanda (新三田) and get off at Namaze (生瀬) station. A local train takes about 40 minutes, so if you want to save time, then take a rapid (kaisoku) train to either Kawanishi-Ikeda (川西池田) or Takarazuka (宝塚) stations, and change to the local train there. The return train is just two stops further north from Namaze, so take a local train all the way back to Osaka or again change to a rapid at Takrazuka or Kawanishi-Ikeda if you’re pressed for time.

Level of difficulty: 1 out of 5 (elevation change 〜100m)

Distance: 7km ( 2 to 3 hours)

This slideshow requires JavaScript.

Oirase Stream (奥入瀬渓流)

October 23, 2013

Oirase stream is one of the most popular places in Japan to view autumn foliage. The flat 14km walk along the entire gorge is filled with soothing rapids and a couple of majestic waterfalls. The only downside is the paved road, which runs the entire length of the walk.

oirase1

The hike: From Yakeyama bus stop, walk out to the main road and walk away from the post office and gas station towards the gorge. Walk past Oirase Keiryu hotel and you’ll see a big signpost for 奥入瀬湧水館. The trail starts just to the left of this signpost. Your first target on the long walk will be Ishigedo (石ヶ戸), about 4.6km away on a well-marked path. The trail soon reaches a paved road, where you should turn right and walk towards  Deai-bashi. Before crossing the metal bridge over the river, you’ll see the path dive back into the forest on your left. About 2km in, you’ll reach a small hut that houses a public toilet. Use the facilities now, because the next toilet isn’t until Ishigedo. The path alternates between the beautiful forest and the ugly paved road. This is one hike where you really need to worry about being hit by a car or tour bus! At the 4km mark you’ll reach a paved road. Cross the road and duck back into the forest, following the wonderful rapids of the swiftly moving stream. Eventually you’ll reach Ishigedo, which is marked by a toilet hut and small restaurant. It should take about 90 minutes from Yakeyama to this point. This is where the majority of people start the hike, so be prepared for a large increase in numbers of tourists. If you’re short of time then you can consider starting from here and skipping the section from Yakeyama, but the first part is a nice warm-up and you’ll appreciate the lack of people. The next signposted landmark is Kumoi falls, which should take about 45 minutes or so to reach. The trail passes through some areas of photogenic swift-moving rapids before passing by some rock formations known as Makadoiwa (馬門岩). There’s a bus stop here if you’re feeling lazy or the legs are starting to give out. Soon after passing by the rocks, you’ll cross over the stream on the concrete bridge and follow the right bank of the river for a while. (up to this time you will have been on the left bank the entire time)  You’ll pass through another area of rapids (signposted as 飛金の流れ) before reaching a small waterfall marked 千筋の滝, which is little more than a trickle. Soon you’ll cross over the road and be back on the left bank of the stream, arriving at Kumoi falls after about 100 meters. Take the path on the left that crosses the main road and leads up to the falls. It’s definitely worth the short side trip, as this is the biggest waterfall in the entire gorge. After sufficient photos snapped, retrace your steps back to the main trail and turn left, where you’ll soon reach another waterfall named 白布の滝. This is a nice waterfall on the other side of the river on your right that drops straight off a cliff. After passing through another area of rapids, you’ll see your first signposts indicating the distance to Tamadare falls. After passing by the bus stop for Kumoi no nagare, you’ll reach a public toilet at Tamadare falls. The waterfall itself is on the opposite side of the road and is nothing more than an unimpressive trickle, so don’t waste your time climbing up to the main road to see it. Stay on the main path and you’ll pass by another trickle of a waterfall (白絹の滝) before reaching Shiraito no taki (白糸の滝), which is very impressive but unfortunately on the other side of the river. Soon after you’ll reach Furou falls (不老の滝), which is also nice but kind of difficult to see through the trees on the right bank of the stream. After passing by more rapids, you’ll reach another unimpressive trickle of a fall called 姉妹の滝, before crossing over the river on a wooden bridge. A few minutes after crossing, you’ll see a signpost for 九段の滝, which is accessible via a spur trail on your right. This waterfall is really nice since you can get relatively close to it. Retreat back to the main route and turn right.  After crossing over the river again, you’ll reach the largest and most popular waterfall in the entire park (Choshi falls).

The waterfall is actually reminiscent of a concrete fall, but I’ve been told that it is completely natural. Climb the stairs just to the left of the fall and continue walking upstream. The next part of the route is closed, which means you’ll have to walk on the main road for a little while. On the right side of the road, you’ll see a signpost for 五両の滝, accessible via a small trail that dives into the forest on your right. After checking out the fall, retrace your steps and continue on the main road for a short time until reaching the continuation of the trail on your right. From here to the end you’ll stay in the forest, where you’ll soon pass by a concrete dam! This is used for hydroelectric power and flood control, and the water just behind the dam is incredibly clear and beautiful. From here it’s a straight shot to the main road, where you should turn right and cross over the concrete bridge and arrive at the bus station and ferry terminal of Nenokuchi (子の口). There’s a restaurant here that serves tasty food on the 2nd floor, with a souvenir shop below. You can either catch a bus out to Aomori, Hachinohe, or to Lake Towada. A more scenic option for those heading to the lake is to take the sightseeing boat, which takes 50 minutes (1400 yen) to reach Yasumiya, the main tourist village of the lake. The boat is great because you can see scenery that you would otherwise miss.

When to go:  As this is an extremely popular walk, aim to go on weekdays between early June and late September. Oirase is one of the most popular places in Japan for autumn leaves, so avoid the peak season in October at all costs (unless you want to share the the trail with hundreds of other people). Winter is also an option if you’ve got snowshoes.

Access: From either Aomori or Hachinohe stations, take a JR bus bound for Lake Towada and get off at Yakeyama (焼山) bus stop. The bus from Hachinohe takes about an hour and a half. Another option would be to base yourself at Lake Towada (staying at Lake Towada Backpackers) and take a bus from Lake Towada (40 minutes, 1210 yen).  Click here for the bus schedule

Level of difficulty: 1 out of 5 (elevation change ~100m)

Distance: 14km ( 4 to 5 hours)

This slideshow requires JavaScript.